This is another project along the lines of the FlowerFace one (previous post). After ordering a rabbit form at the same time as the coyote one used for my other project, I got the idea to do a neon colored rabbit. Here's how I did it.
-----
 First we have the rabbit form and the plaque. The plaque is a size 9x12. The form is for a jackrabbit- a little bit bigger than a normal rabbit. That piece of (faux) fur next to it was to test out and see if painting it with acrylic paint would work. It didn't- it ended up looking wet and spiky.
-----
 Next we have to attach the fur. We have a huge box of white faux fur from when my brother made his girlfriend a teddy bear (really!). Apparently he bought way too much. Anyway, I got thinking about how to color it, since I wanted a neon rabbit. After trying paint and spraypaint, which didn't work very well, I settled on a neon orange paint pen. It works amazingly. So what I did was hot glue the fur on, and after gluing it, trimmed it, and then painted it. The progress shown in this picture took about an hour, since it was completed while watching Conan O'Brien.
-----
 After attaching some of the fur I made the ears. I just used Super Sculpey, wire, and a little wire mesh. In retrospect I probably could have just used a wire outline and attached the fur around that. This picture is me testing out the position of the ears without gluing them down yet, since I still had to glue the fur on. Also, that wire going across the ear needed to be clipped off later. Woops.
-----
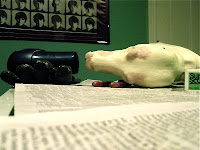
 It helps to draw lines on the rabbit and then cut the fur into the correct shapes. That way, you can put it together like a puzzle. This picture also shows the eyes. I bought a lot of 100 blank glass eyes on eBay. I needed to carve away a little bit of the foam around the eyes, since the glass eyes were a tad bigger. For this I used a sharp hook shaped tool for ceramics. I just painted the back of the eyes with acylics, and they were hot glued on. Also, note the lint roller in the background of this picture. The hair gets /everywhere/.
-----
 Here's another picture of the rabbit as I kept adding the fur and coloring it. The ears were attached at this point. They look a bit fat, which is why I should have just skipped the clay and only used wire. You can see the uncolored fur on the face, which had to be trimmed a lot.
-----
 After attaching all the fur, I colored it. I colored it a bit as I glued it, just so I wouldn't get bored cutting and hot gluing. In retrospect I could have saved some paint by gluing and trimming all the faux fur before coloring it. This only took one paint pen, but it was basically completely gone when I finished. In this stage, it wasn't glued to the plaque yet, I was just seeing how it looked. It also needs whiskers and I have to color in the nose.
-----
 This is a picture of the finished product. At this point I had already put it up in my house to surprise my family, so I had to climb up to get a picture. You can see the whiskers and the painted nose/mouth in this photo. The whiskers were made with some kind of clear thin plastic string that I bought at a hardware store, and the nose was painted with acrylics. The whiskers were just hot glued and then stuck into the fur on the nose.
-----
That's it! Since this one was relatively easy, especially compared to the FlowerFace one, I have already ordered more rabbit forms to make other neon rabbits. One day I might have an army of them to sell.


